Including a primer on SPAN and installation instructions for Ubuntu 22.04
One of the best free and open-source tools to monitor your network is Wireshark. If you’ve already installed it on your computer but don’t know why you’re not seeing any other network traffic besides your own, this article is for you. If you haven’t installed Wireshark yet, you can visit wireshark.org to download it for your OS if you’re on Windows or Mac; otherwise, I’ll go over how to install it on Ubuntu 22.04.
What is SPAN?
SPAN is an acronym for Switch Port Analyzer. It’s also known as a port mirror. When you install Wireshark on your computer, you can see the traffic you generate, but not other devices on the network. Why is this?
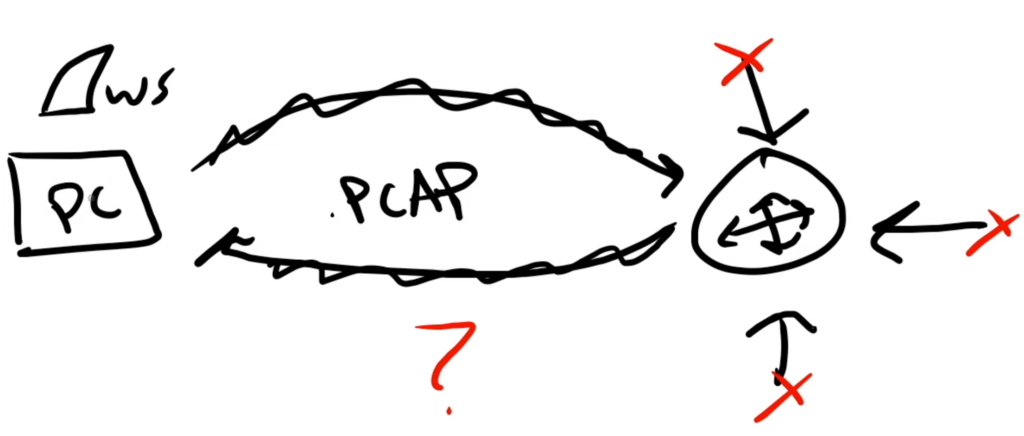
Well, it has to do with how traffic moves through your network. While I’m not going to dig too deep into networking concepts, the basic idea is that most/much of…a lot of your network traffic is being directed by your layer 3 router (for the sake of brevity and simplicity I’m not going to cover layer 2 switching since you will miss some traffic depending on how your network is set up). And your computer doesn’t see anything because none of the traffic on your network needs to traverse it. But it *does* traverse the router (again, in general)! So we need to figure out a way to “mirror” (i.e., duplicate) what your router sees.
In comes SPAN.
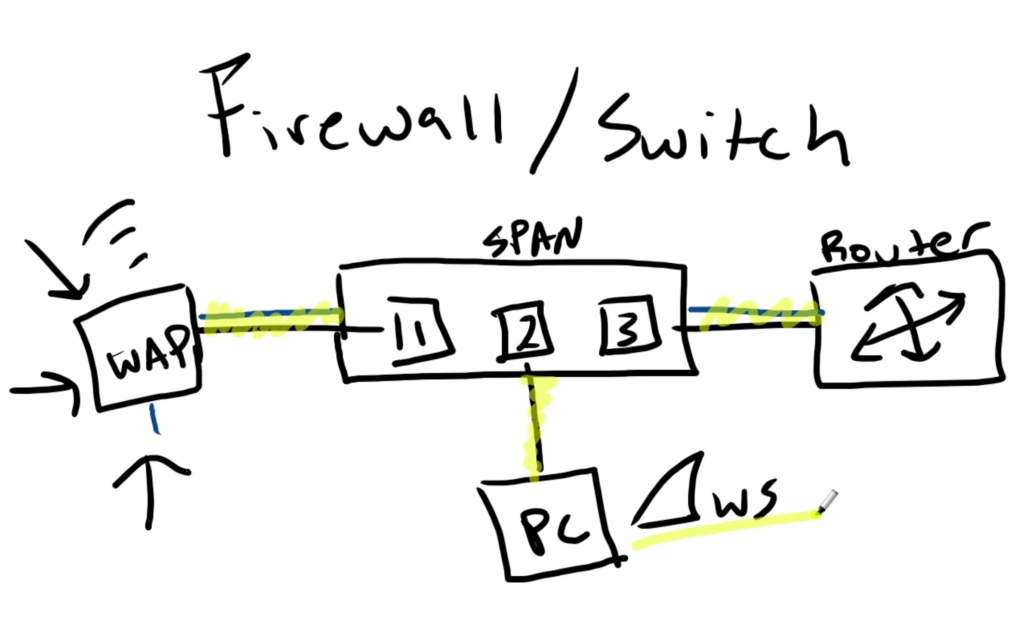
SPAN allows us to take a source port (traffic that we want to mirror) and send it out to a destination port. For this you’re going to need a managed switch or a firewall appliance that has SPAN capability. So in the example above, any device that connects to your wi-fi at home and needs to enter or exit port 1 will get mirrored onto port 2. And that’s where we have our computer waiting with Wireshark installed to capture that traffic!
Pretty cool, huh?
Unfortunately I won’t be covering how to configure a SPAN port in this tutorial, but I do plan on covering it in the future with a Fortigate firewall and a Cisco Catalyst switch.
IMPORTANT CAVEAT: in the above simplified example we have only one ethernet connection, a SPAN, from the switch to our monitoring device. When a SPAN port is enabled, it’s only function is to mirror traffic, so you won’t be able to communicate with any devices on the network, but you’ll still be able to monitor the traffic being mirrored on that port. If you want to monitor the SPAN and have network connectivity, you’ll need two NICs (network interface cards) which will come with two ports. One connection can be made to the SPAN for monitoring and the other to a normal port on the switch for network connectivity. If your machine only has one NIC, not to worry! It can easily be “created” with an ethernet-usb dongle. Once plugged in, you should be able to check your interfaces on the command line for which ones you want to use.
Installing Wireshark on Ubuntu Desktop 22.04
Installing Wireshark on Ubuntu Desktop 22.04 is pretty straightforward. Open up your terminal, and as always, update your packages and repositories.
sudo apt update && sudo apt upgrade -yThen install the Wireshark package.
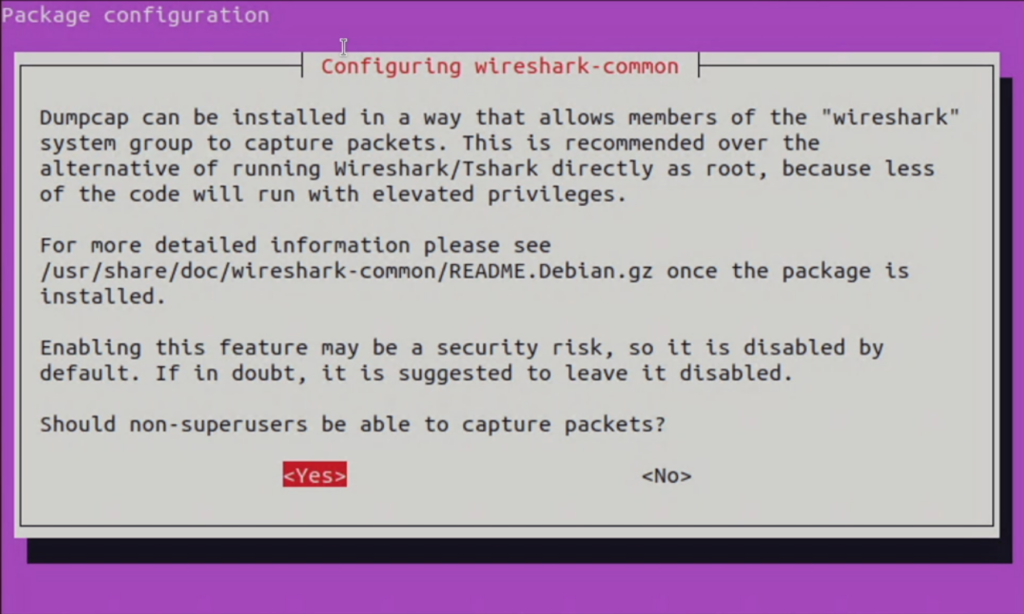
sudo apt install wiresharkYou’ll be asked if you want to allow non-superusers to capture packets. The language could be a little clearer because we are installing it on a superuser account, but in this case, if we don’t want to run Wireshark as the root user, we need to select <Yes> so we can add our user to the wireshark group.
Side note: your user is not a member of the sudo group automatically when installing Ubuntu, yet when we add it to the sudo group, Wireshark will still complain and tell you to revisit the wireshark-common configuration and select <Yes>.
Once you select yes and Wireshark finishes installing, add your user to the Wireshark group
sudo usermod -aG wireshark your_usernameIn order for this change to take effect, reboot your computer, and open up Wireshark. It should look something like the below.
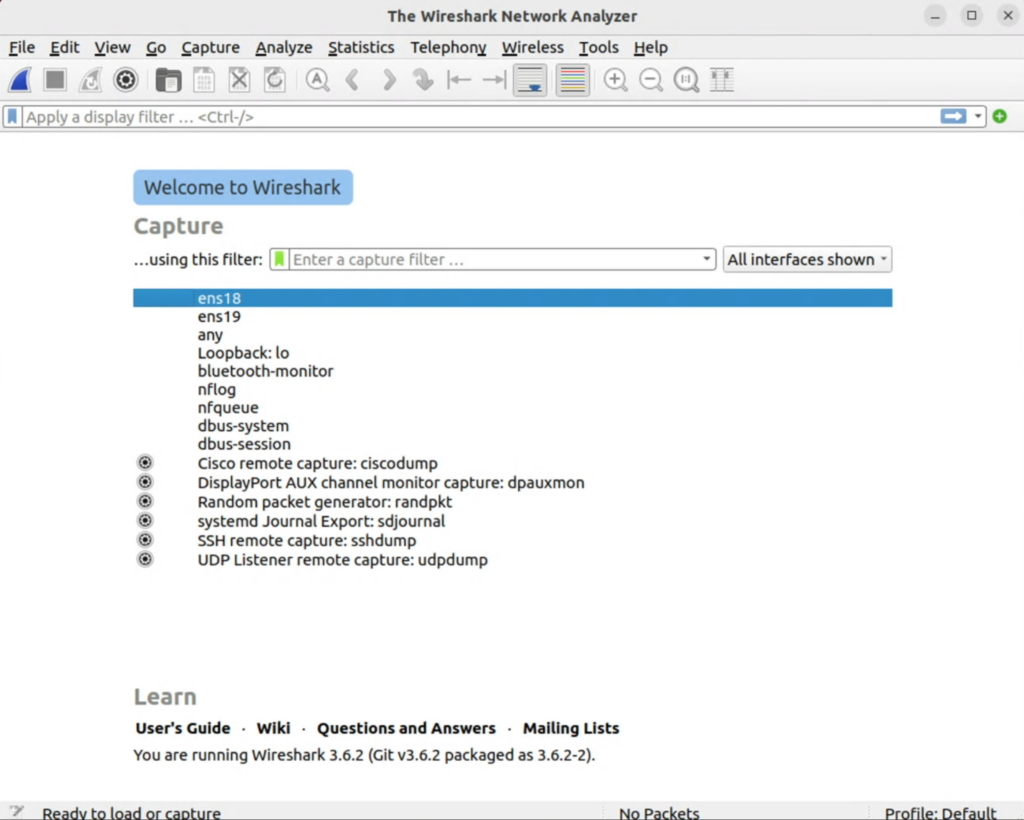
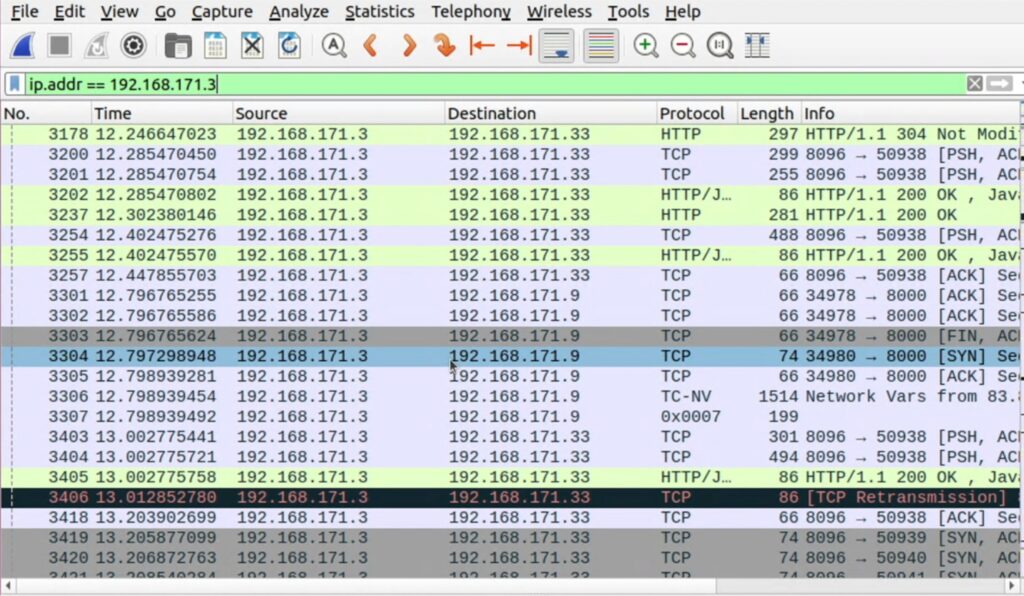
I have two interfaces with connections to my computer in this case. Interface ens18 for normal traffic and ens19 for mirrored traffic. I can click either one to begin capturing packets, or select “any” for any interface. From there, you can investigate and analyze the packets on your network.
Happy capturing!